Wednesday, 23 September 2015

Chain of Command Challenge (3) Sometimes it just goes wrong......

We were back at Asgard Games in Middlesbrough for the British second attempt to probe the German defences around Gheel.

Here is the map we are using - a 1:50000 of the area from 1944 with the bottom circle showing the area of the probe action, and the second circle the Green Howards main objective for the day the Gheel Road


and this is the actual area of our encounter

Time wise the clock has moved on to noon on Sept 8th 1944 and Andy Parkes playing Lt Cake of the Green Howards has spent a little time running over this mornings action in his head. Now coming back over the same ground, he has decided to push on as much as he can.

Here is the battlefield with the last houses of the hamlet of Meulenberg and the Doornboom road running diagonally across the table.


Andy's job is rather simple, he just has to get one team off the table on the right hand side at which point the German (Paul) forward defence line will be compromised and he will have to fall back - Simple!

Sometimes it is. Paul was quite happy with his last game, he had beaten Andy back without breaking into a sweat, so his Senior Leader must have been enjoying a bit of a nap when he was rudely woken by the news that the Tommies were back, and that they were already outflanking his position. Andy had rolled well in the Patrol Phase and had pushed forward quickly. Paul had not realised just how far ahead he had allowed Andy to get, in fact his patrol markers were a long way over the table before they were frozen in place. Things were looking bad for the Germans, but at least they had the first move.


Paul realised he was in trouble and tried to race a pair of squads across the open ground to bring the British Jump Off markers under observation and fire.

Andy deployed his lead squads almost on top of the table edge (his objective) but came under heavy fire from Pauls deployed squads and their dreaded MG42s


Three Tommies fell, but it was not enough to stop Andy using the next activation to rally his men and push a team across the line to victory!

Paul scowled a bit but had known that after his failure in the Patrol Phase it was going to be a tall order, and anyway it was better to fall back to the main line of defence than take casualties trying to correct his earlier mistake, so withdrew.

Back at HQ Lt Cake is a little more popular with his CO, but less so with the lads on the Platoon who have now twice taken losses significantly higher than the opposition. On the German side Paul got a severe lecture from his frustrated CO but he went up in the men's esteem due to his getting them out of there before things got too dangerous.

Andy was then given the choice of waiting for the Engineers to get the Bailey Bridge in place before the next attack, which would allow him armoured support but could risk a German counter attack or digging in, or pushing on to the main German positions around the Gheel Road. He decided not to risk the delay, so the next game will be an immediate attack on the German defences. He has plenty of support available (9 points) but he cant choose anything that cant be ferried across the canal in assault boats.

Next game will (probably) be after Derby so watch this space............


Tuesday, 22 September 2015

Taking the CoC Challenge (2) - a different perspective

I asked Andy what he thought of his first game of CoC - here's what he said....

Chain of Command … A lesson learnt the hard way!


Having been asked to try out these rules I popped across to Asgard games in Middlesbrough with Ken and Paul for a quick game.


It was based around the successful crossing of the Albert Canal and the subsequent battles for Gheel. As the allied player I took command of 16 platoon of the 7TH Green Howards my local Infantry Regiment and one I had the pleasure of serving with.
As the is based in the North East I took my recruits from the local area.


After rolling on the Character generation I took the guise of a fresh faced 2nd Lt.


2nd Lt Thomas "T" Cake,  Strapping six footer, Queen Elizabeths Grammer school, from Darlington, Capt of school cricket team. Head Boy.


Sgt "Smudger" Smith, "Colonial" Average build. From the Dales.


No.1 Section Cpl "Dusty" Miller, Factory Worker, Average build. From Middlesbrough


No.2 Section Cpl David "Poncey" Williams, Bohemian, Intellectual looking, Average Height. From York


No.3 Section Cpl "Chalkie" White, Grease Monkey, Average Build, Unremarkable. From Sheffield


So first off was the patrol phase which I have to be honest I didn’t understand the concept or what I was really trying to accomplish, which is where it started to go wrong. The idea seems to be to pin the enemy in an un advantageous position so as to make placement of squads difficult., which I didn’t….


(After wards I read up more on this section, on the two fat lardie’s tactics section and believe I’m now more prepared).


So using my skills as a section commander I placed my first section under cover of a hedge, with my Bren group set up in over watch at a 45 degree arc at the corner.
The German’s advanced and my Bren group opened up, which just seemed to annoy the Germans and allow them to spot me. This is when I realised how much the British are out gunned.


(Those MG42’s don’t half throw out the dice.)


My one redeeming feature of the British platoon is the lifesaving 2” mortar which just kept pouring smoke onto the German MG teams. Another problem I had was the inability to roll 6’s which adds to your COC dice and the ability to end a turn (more later).


SO my second section comes into play and I strip off the second Bren team and form a fire base of two Bren teams which came under control of my Platoon Sergeant. My second section under cover of smoke ran for the cover of a building opposite the field. (not a problem I’m covered by lots of smoke….OR so I thought.


The COC dice comes into play and the Paul the German player ends the turn…SO.?
Well off goes the smoke and to the Germans delight there is a British rifle section in the open. Trying to get rid of the mounting markers and the casualties I have just taken my Platoon sergeant takes over two section.


Meanwhile the first section is taking more casualties and I deploy my third section just forward and plaster the German section in front with the help of the two other Bren teams.
Great I thought next turn grenades and a bit of Bayonet drill will soon sort those damn jerries’ out!

This is again where the dice let me down, two sixes by Paul, leaves me losing the next turn and allowing two turns for the Germans to rid themselves of markers and pour on two turns worth of fire, which left the third section in a very poor state.


In the end finding the road to be too heavily defended my platoon retired back to its own lines.


Rolling on the after game table and the opinion of my commander and troops gave me.


CO's opinion "5"
Men’s Opinion "6", 2"
Support I roll a “1”


“So Lt Cake has fallen back. Four "dedders" I'm afraid, with three more sent to the RAP so seven men down (only six as one of the dead is from the spare 2" Mortar. CO is less than impressed and the men are a bit concerned - both need their opinions checking.”


"OK Cake, looks like you have taken a bit of a pasting, but we need to get to the main road, so get your lads a brew, ammo up and try again, I'm sure Jerry is also taking a beating and is ready to collapse if we can push hard and fast. Just remember your Battle Drill"


And with a not so outstanding performance under my belt I ammo up and prepare for  another bash..

Friday, 18 September 2015

Taking the CoC Challenge

Richard Clarke of Two Fat Lardie fame has issued a challenge to non CoC players to try out CoC. Clearly this rules me out as I already play, but my mate Andy doesn't, so I casually asked if he fancied trying them out - Gotcha :-)

Of course now I need something to generate a scenario. The game was to be played at Asgard Games in Middlesbrough using their terrain, but the toys will be down to me and my Minion Paul, so Brits vs Germans is a good idea.

So now for a scenario. The game was going to play Wednesday evening, 9th September, so on a whim I thought I would look at what was happening in 1944, and struck it lucky. Not only is there a viable scenario, it involves Andy's old Regiment, Alexandra, Princess of Wales Own Yorkshire Regiment, or as they are more commonly known, The Green Howards.

In September 44 6&7 Bttn were part of 69 Brigade 50th Infantry Division, along with their neighbours 6 DLI, On the night of the 7/8th September 1944 they paddled across the Albert Canal and started towards the town of Gheel next morning - so a perfect opportunity for a scenario if I could get a bit more details. Not a problem as someone else has done the donkey work - in this case a Gent by the name of Ulf Norman who posted some details on a project he had been working on for the computer game Combat Mission which he posted up here . A little bit of Google Earth plus some searching for on line maps and I was all set...

to be continued

Wednesday, 12 August 2015

Boxing Clever

I needed something to fill up the space in a warehouse \ factory I was planning for a scenario, something a bit different to the ubiquitous oil drums. I was watching some cop show on the TV and they got to the inevitable fight scene, and then I saw it – cardboard boxes!
They get everywhere. People hide behind them, get thrown into them, and no car chase is complete without driving through at least one of them.
So inspired, I googled “scale cardboard box” and got this useful link
If you would prefer to design your own they are simply four squares or rectangles plus some tabs to allow you to glue.

I rescaled them to 50% so that eight would fit to a sheet of A4 and printed them out onto coloured card, then quickly cut them out and scored along the edges


You can stack them if you wish, and although only thin card, once based they are pretty robust.
Next I’m planning on designing some of my own with different logo’s, and also getting some different coloured card to break them up a bit.


The end result. As you can see you can leave them fairly rough , stack them neat or as a jumble, you can even crush a few if that fits your need.


Wednesday, 22 July 2015

Come and Av a Go if you think you're Ard Enough?

Rob came up to me a week or so ago in Asgard Games and pressed a set of rules into my hands asking me to read them, maybe I’d be interested in trying them out???

I’ve pretty much “been around the block” several times as a wargamer and instantly recognised the mild desperation tinged with hope that you get when someone is really wanting to play a game system but can’t convince his fellows to get involved. It happens to us all. What I should have said was “Thanks Rob but I’m just so busy with other projects I can’t take on another” and it would have had the added bonus of being true. However I am a soft hearted sort really so accepted the proffered rules on the understanding I would read them and return them.

I’m not wholly sure if my intention was to read them, or maybe just wait a week or two and then return them, but read them I did.

The rules are called Aggro, produced by Ainsty and are a semi skirmish set in the mid to late 70s around the theme of football gang violence.


This is a bit of an issue for me personally. I’m old enough to have been there when the real thing was happening – going to the match with my Dad, and can remember being escorted by the Police out of Fleethams after watching the mighty Hartlepool United beat “the Scum” (aka Darlington AFC). Nowadays football violence is something we thankfully seem to have grown out of, but then it was a major issue. Given this I was pretty much prejudiced against Aggro from the start.

So I was pleasantly surprised when I did get a half hour spare and decided to read them. The rules are well written, with some really interesting aspects and mechanisms. They’re card activated and all combat is card driven, all using a standard deck of playing cards. There are rules for gang building and a rudimentary campaign system, all in all pretty good and well worth the price of a tenner. If this is your thing, or you are looking for an interesting non dice mechanism then Aggro may well be worth "having a go" at.

Will I play them ? – probably not. I can’t see myself investing the time and money for what would be another “boutique” game. I’m also 100% sure the setting is not attractive to me either. Given the popularity of fantasy \ Si Fi sports games – BloodBowl, DeathBall & now GuildBall the authors may well have been better shifting the setting to a post match brawl between rival gangs of fans for those types of games – the rules are robust enough to handle it, and would give that extra edge to any fantasy sports game.


So sorry Rob, not this time, but thanks anyway to Rob & Ainsty for a nice set of rules and associated figures. Now I’m off to find my bobble hat and rattle.

Sunday, 28 June 2015

Slippery Slope or From Wales to Ireland via Roman Britain in several confusing steps

Just back from Asgard Games in Middlesbrough where we had another game in the Dux Brit campaign.

But first a quick explanation as to why I need to buy some more figures. I’m writing this down just so I can get my head around it J

I decided to try Dux because it offered a couple of interesting and quick gains. Firstly the idea of a campaign based game where each on table fight had something to connect it to the rest. Secondly, it was by TFL and they seemed to be on good form producing types of games I like, and thirdly, and most attractively, this was going to be both cheap and easy game to get into because I could use the figures I already had painted and based up as Welsh for Saga as my Romano-Britons, so the only expense was the rules – can’t go wrong!

Want to bet?

When I had the rules it became clear that while this was all ok in principle, in practice I would have a problem as most of my Welsh were lightly equipped and trying to pass them off as a Shieldwall when most of them had bucklers or no shields at all was a stretch too far. So I bit the bullet and bought some suitable Romano British infantry – just a dozen to stand as shieldwall, then I got some plastic Gripping Beast Dark Age infantry to provide the bulk of the Levy, and then another couple – ok , eight, figures from Footsore to be the Elites. At this point the only part of my Dux force that was actually from the Saga Welsh was 4 skirmishers with javelins (which should really have slings) and the three Nobles.  

I had plenty of spare plastic figures from Gripping Beast so I decided to convert four to slingers. May as well as they would only join the “lead & plastic pile” In the end I used some old Wargames Factory Persian arms and slings rather than the GB ones as they looked “meatier”. I gave them the same rush paint I did for the Levy and they all went through with me to Asgard today for our next campaign turn, so only the "Welsh" Lord and his Nobles would be used of the original Saga force.

The well laid plans………..

So when we gathered it became obvious that due to other commitments we had managed to get only one raider player to attend – yup, three Romano Brits were there, but only Steven was available to represent the Saxons etc, and his warband was still recovering from his last attempt to cross the border.  We all say around looking a bit dazed as this was something no one had really predicted, and it was agreed we maybe should look at getting the British players access to a Saxon army just in case that happens again,  then I heard myself say “I think I can do an Irish list if someone can lend me some cavalry – I don’t have any Irish as such but I do have these Welsh guys I got for Saga……….”

A short while later I found myself commanding an Irish raiding force looking to capture a Roman Noble from a border tower. 

Mark was the defender, and here is his noble returning from patrol in the badlands with his command of two units of warriors.


Here is the rest of his force, happily ensconced in his border tower.


And here are some suspicious looking raider cavalry who have just appeared !


The game went quickly. Mark sallied forth with his main force in an attempt to link up with the returning patrol but they were intercepted first by the light cavalry, which they drove off


and then by a much more aggressive force of Irish (with Welsh accents) and their Lord, intent on gaining Honour and Glory. The Irish also kept up a steady rain of harassing javelin fire interspersed with a sling-stone or two.


The Irish charged, and in a quick and brutal melee overwhelmed the returning patrol, but their leader failed to get himself that all important war wound to show off back home. Their captive safe in their hands they then asked if the British wanted to contest their withdrawal. Mark decided it was not worth the risk, so the raiders made good their escape.

Great little game, and good to see campaign causing both players to play the long game.

Rob & Steven them played their raid – again against a border tower, and this time Steven got away with a noble hostage who he has already ransomed back to Rob.


So with a bit of flexibility we got a couple of good games in and fun was had by all. Only problem now is I need some Welsh ..err sorry Irish Cavalry to complete that Irish list now, you know , the one that was going to be a good stand in for the Romano British that meant I would not have to buy and paint lots of figures to play the game – you do remember don’t you?

Thanks to Steven, Mark Rob and the rest of the Guys at Asgard for a great day gaming. Next week there is no campaign turn as some Numpty has organised a Dropzone Commander demo, but the week after we hope to be back to the borders, protecting Christianity and the Empire!

Tuesday, 23 June 2015

Dux Campaign March 550 Anno Domini

The first Saxon raid got our Hartlepool Club Dux Brit Campaign off to an interesting Start.

Paul and his Saxons had snatched some livestock and were heading back to the boats through some fairly bleak and marshy terrain - see pic. He also managed an awful pre battle speech which cost him Force Morale points and a Fate Card. My Romano Brits managed to over indulge on the booze "Nunc est Bibendum! gaining two points of force morale, losing a fate card (and two bibamous cards added to the fate deck) followed by some pretty damned impressive speechifying which cancelled out the lost fate card and gave the Lord level 4, at least until he and the troops sober up :-)

Table looking up from Saxon start to their exit at the other end

The ill gotten loot
The initial set up and scenario went badly for him - he only got one turn head start on the Romano Brits , and they in turn came on very close to his forces.


The main British force arrived quickly as the Saxons struggled to get their stolen sheep home

A well thrown javelin slows a Saxon Unit

Romano British arrive in force
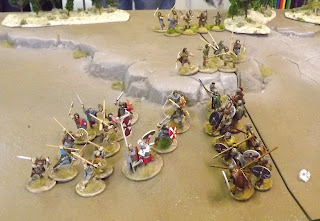
The British closed steadily with their Warriors and Elites while the Saxons tried to face them off.


At the last moment the British Lord tried to wheel his shieldwall to give him maximum frontage fighting, only to roll a "6" for the move and the whole formation fell apart in front of the Saxons! Luckily the Romano Brits (me!) won the next initiative, reformed the shieldwall, and charged in!

The fight that followed was hard and bloody, with only the Shieldwall saving the Romano Brits from terrible casualties, and the pre game drinking session hadnt helped, with Paul playing a sequence of Bibamus cards as the melee ground on.


Luckily the Shieldwall held, and the Saxons broke after a prolonged fight, just before the Saxons could outflank it.


Paul wisely decided to abandon the sheep and other livestock and leg it - and I certainly was not going to contest the retreat. The Saxons got away using some well played retreat cards to minimise their losses, the Romano Brits scoring an overall +2 win.

Good fun, and the Saxon threat to this part of the Kingdom has retreated for a while at least.

This scenario went badly for Paul from the outset, and demonstrated just how unbalanced some of the campaign scenarios can be, but in a good way. Had Paul gained more of a head start, or the pursuit not started as close this could have been very different. It also showed some really interesting facets of the rules off to good effect. Shieldwall is great as long as you can close - in the post game chat Paul admitted he made two mistakes, the first being getting involved with a melee with the shieldwall. Even then he almost managed to outflank it, which would have been pretty bad or me. His second mistake was keeping his Lord at the back with the sheep - he thought it was a good idea to survive campaign turn 1, but in doing so he negated his main commanders ability to influence the fight - lessons learned. From my point of view I learned a couple of interesting ones too. Having two Bibamous cards in the deck from my overindulgence pre game left me with some pretty apprehensive moments every time Paul reached for his fate cards. The +\- 1 in combat is bad enough, but the loss of control, particularly when trying to get a shieldwall together, was a very big worry. May make me less likely to reach for the beer next game.

The other point I was impressed at was just how much fighting a campaign game made us both wary of our campaign positions. My losses were initially low but as the fight at the shieldwall wore on they began to grow to the point that even if I won I was risking my campaign status. I'm going to pay a lot more attention to the pursuit cards in my fate hand next time - it may even be worthwhile letting the Saxons win the odd raid rather than suffer heavy losses fighting over a sheep.