Showing posts with label Battle Reports. Show all posts

Sunday, 12 July 2020

Back in the saddle - Battle of Britain Campaign game 1


This afternoon saw my first game against a real opponent since the lockdown began, and it was nice to get back to a table - even if we were socially distanced. 

The game was Blood Red Skies - actually the first of what we hope will be a series of BRS games that will run over the summer mirroring the phases of the Battle of Britain - so real time minus 80 years. I should add as this was our first game back we were quite rusty and also managed to forget the sea coloured gaming mat, so we made do with a spare from Cruel Seas that was in the shop, and also my camera was still charging so I had to use my phone - which is my excuse for some of the ropy pics that follow

I'm playing the Germans - in this case elements of I / ZG 76 in their Me110s. Todays game was part of the KanalKampf phase of the battle and was a Fighter Sweep mission over the Channel.

We ran into some RAF Spitfires and had a very interesting battle. The initial pre game and set up didn't go well for the Luftwaffe. The RAF played the "Restricted Airfields" Theatre card, meaning in the confusion and congestion on our new French airfield something went wrong and one of the 110s failed to join up. This wasnt a one way thing however as the RAF were suffering from the "Supply Shortages" Theatre card - still getting back up to strength after the Battle of France and this caused them to enter the game with one Boom (morale) chit.


Slightly less satisfying was the initial set up positions. Both elements of 110s were caught snoozing and were disadvantaged, with the RAF being much more on the ball, starting with one pair in High Cover, one Advantaged, and one disadvantaged. This was quite a blow as one of the quirks of the scenario - starting positions of Disadvantaged aircraft are chosen the opponent not the player. This was not good!  Here is the set up with the Luftwaffe circled in yellow and the RAF in blue.


The first turn saw the 110s form something vaguely resembling a Lufbery Circle with both elements trying to cover each other as the Spitfires came screaming in.


This was however a cunning plan (or at least it seems to have turned out ok , which is almost the same thing!). The 110s made judicious use of the Dive Away \ Great Dive combo to put some distance between them and the Spitfires, wrong-footing the RAF somewhat who were not expecting the Germans to be able to burn advantage to dive. It has been said many times that Great Dive on a Speed 7 plane isn't that great, but in this case it was a lifesaver, allowing the 110s a little time to claw for altitude \ Advantage. One lone 110 piloted by Lt Hubert Gruber bravely engaged a pair of Spitfires to buy time for the rest of the Squadron.


This allowed the COs pair to dive through the clouds and get into a position to turn on the Spitfires in the next turn (hopefully)


A fairly "active" furball then developed, however the 110s were careful to keep their discipline and not throw away their planes in risky manoeuvres, and also cover each others tails - clearly having read the  Dicta Doug!


The RAF seemed to be having an off day. The Spitfires were I think intimidated by the firepower of the 110s and started to use their Defensive Tactics doctrine a lot. This is quite an interesting card as it allows a plane to turn a normal shot into a much harder deflection shot, but at the cost of breaking up your formations. No Spitfires were shot down, but they did accumulate some Boom Chits and more importantly, they lost their cohesion and wingmen, and it was now the 110s that were in the driving seat. 


The RAF did manage to rally a little and regain their composure, with one pair of Spitfires latching on to the German leaders tail. Luckily he had the "Sixth Sense" Ace Skill, which stopped him becoming tailed. 


The game ended when the Luftwaffe managed to score enough Boom Chits to make the Spitfires head for home. It was a bloodless victory but a good way to blow the dust off the models and get a game in. Looking forward to the next mission where I hope to sink some British shipping in The Channel !


Tuesday, 4 February 2020

Vapnartak Blood Red Skies Tournament report

2nd February was Vapnartak show in York - one of my favourites. This year I was running a small Blood Red Skies Tournament, and much fun was had.

We initially had 9 players with me the odd one out acting as sub. Sadly on the morning one of our players had transport issues so I got promoted to active player. Luckily for me Paul was driving - on the understanding I got the pizza in later - seems a fair deal.

We set out about half seven, stopped for breakfast and other refs, then arrived at York about half nine. As tournament players we were able to bypass the queues and get straight up to our spot and set up.

Players all arrived on time, and following some introductions we all "set to". the format was three games, each an hour long using the "Dogfight" scenario from the rules. The first two games would take us to lunch, and then after an hours break we would finish up, just in time for "Tea and Medals". We had quite a selection of Squadrons on show, covering all the main BRS factions - 3 RAF, 2 IJA\IJN, US (Marines), Luftwaffe,  and my own Soviets. We also had some interesting "builds" - possibly the most interesting being the four Wildcat Aces with complementary skills, and at the other end the FW190 Squadron with a couple of average pilots but the rest all rookies. I'll post the full Squadron lists at the bottom so people can dissect them if they want.

I'll not go into too much detail on the matches other than to say they all played fairly smoothly and without any problems - a testament to the rules and the players, all fine chaps. The three game format worked well I thought, with the majority of games being decided before the hour cut off. It was nice to have a real break to both shop and "refuel".

I was interesting to see some of the games were quite "cagey" with all players using clouds and jockeying for position with very little initial shooting, while other games were pretty much "pile in and see who shoots best". I can't give much comment on the games other than the ones I played.

My first match was against Sean and his Zeros. This went ok - I was actually ahead until Sean was trying to work out how to get a shot on one of my Migs, and I, still in helpful organiser mode, explained how he could do it - and he promptly shot the poor Ivan down! (memo to self - its a competition - keep your mouth shut!). That game ended in a winning draw to the IJN as we both were forced to retire due to Boom Chits (morale) but Sean had one kill.

Second match was against Ross and his FW190s. I think I managed to put him on the defensive early on and he never really recovered, partly due to his Rookie pilots and partly due to my Migs getting in close using their Great Dive Trait - probably the only thing the Mig is good at. I also remembered my memo and didnt prompt Ross when he forgot to use his Robust Trait - I needed all the help I could get! We shot one FW190 down and Ross was forced to disengage - a 6 point win.


Last match was against Chris and his IJA J2M Raidens. Chris was probably the most assured of the guys I played, and his J2Ms had a lot in their favour, but I did have the numerical advantage and attempted to isolate one of his elements quickly. Chris made a minor error and I got lucky several times with my dice, isolating and shooting down a J2M before it could get to the safety of the clouds, which combined with some other Boom chits inflicted earlier caused him to disengage. I was very relieved at this!


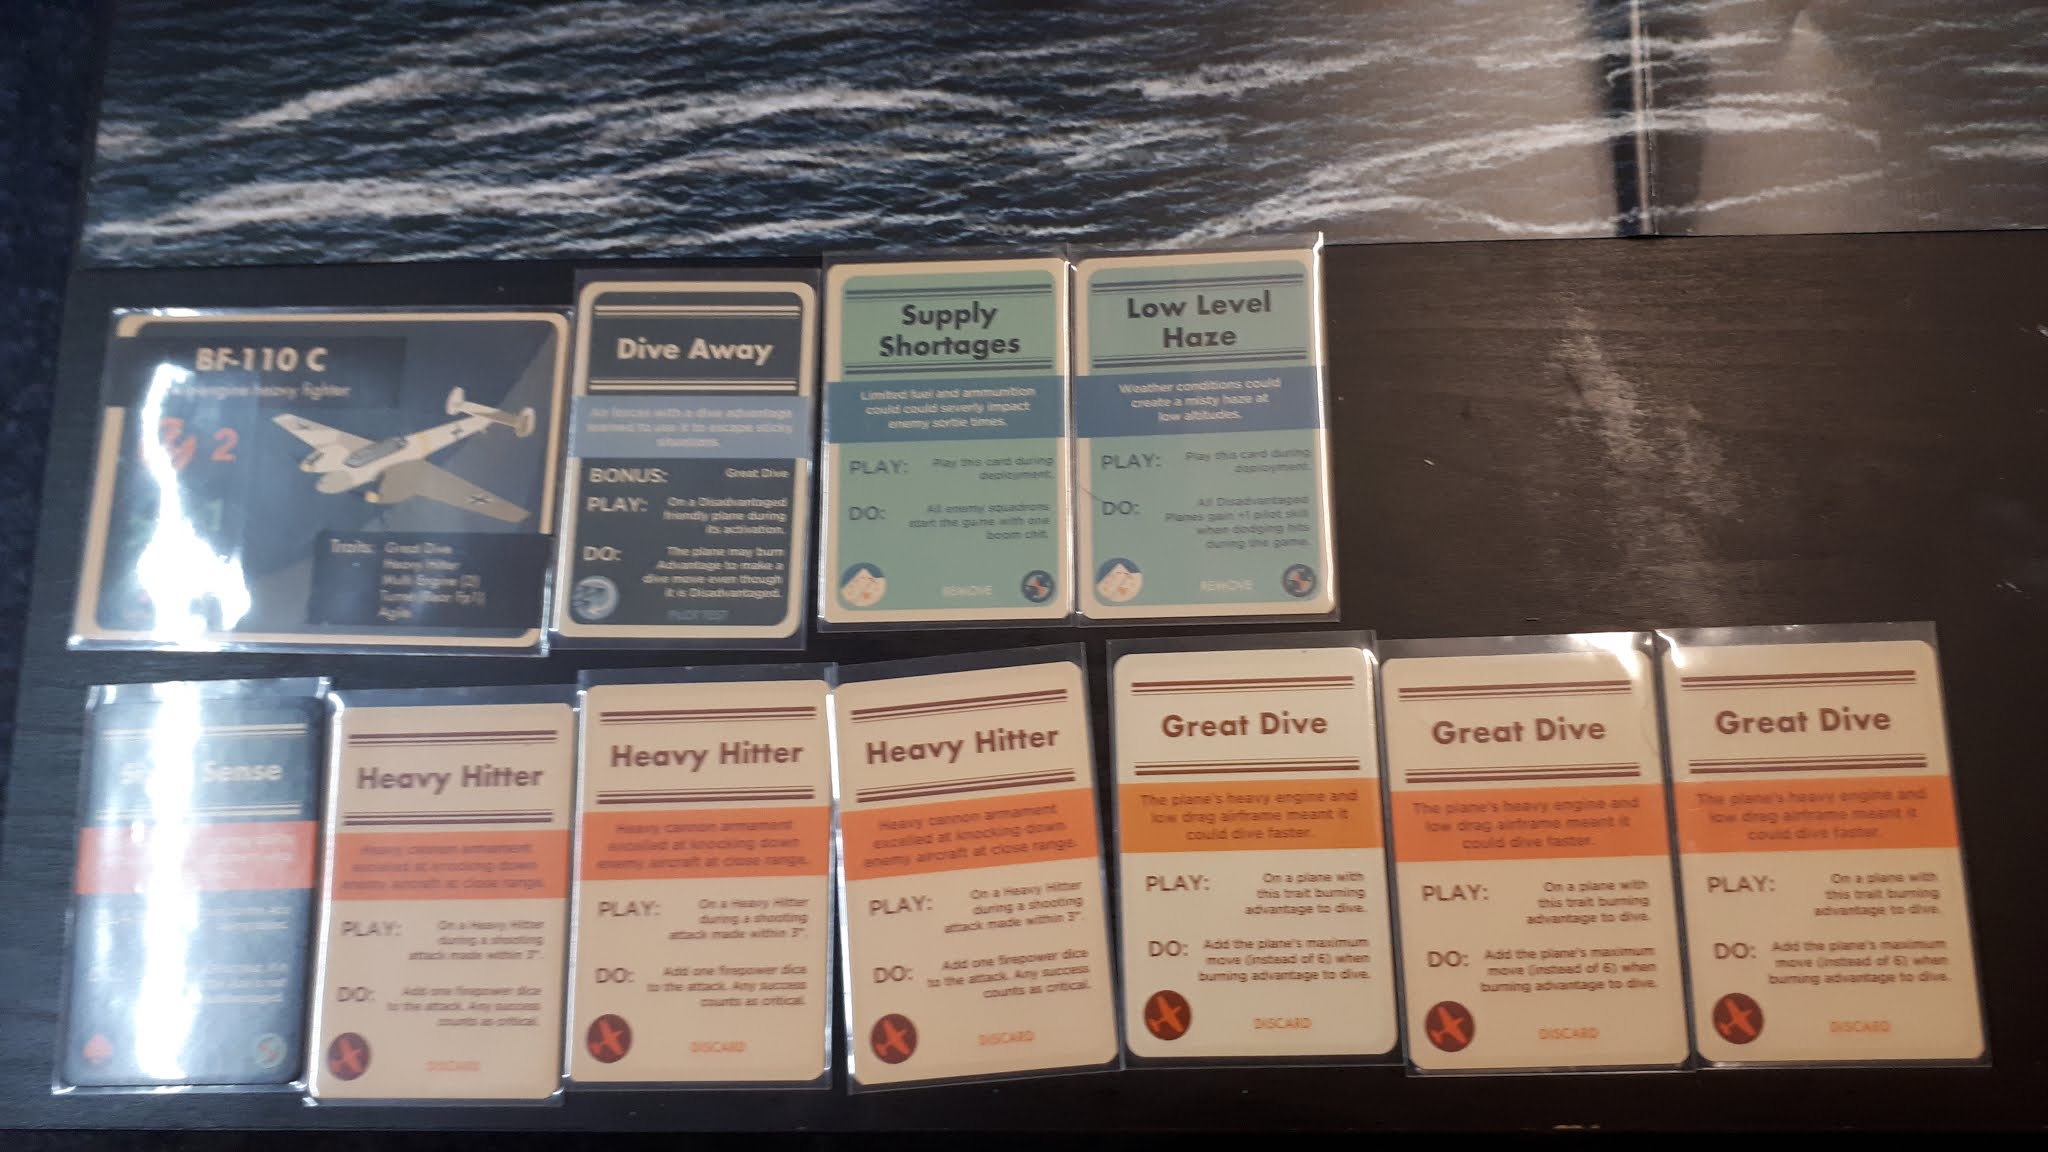
All the players had some interesting Theatre and Doctrine cards in play, and they certainly has an impact. My "Restricted Airfields" was certainly a very powerful choice (possibly too powerful?) as it causes opponents with equal or greater number of planes to lose one at the start. That has two big impacts. Not only does it reduce the number of planes (and therefore boom chit capacity) but it also forces most opponents to deploy in only 2 elements, leaving me with the tactical advantage of deploying an element last. I wish I could say I had thought of this in advance, but my taking it was just down to pot luck.  I suspect that will be a very solid choice for players using more expensive planes and high quality pilots. Ross and his "Low Level Haze" was also an interesting as it made surviving if you got into trouble easier, but that worked both ways. Chris had a great combo in Tropical Conditions and Tropical Filters, which nerfed the speeds of opponents who didn't take filters as equipment. Joe took Defensive Tactics. This is certainly a very powerful choice if you have planes with Tight Turn, effectively making most tailing shots deflection shots. As we were using the optional "need a crit to hit on deflection" this really made his Hurricanes buggers to nail down, but I think on balance it can also make you too defensive, and makes it difficult to line up shots for next turn.  Most players took "Drop Tanks" and this is one of the cards I think we may have to think about in future Tournament use. It is free, and other than a minor initiative nerf on turn 1 helps negate many of the other Theatre card effects. Needless to say I took it!

As for builds - we didn't see any twin engine fighters. We were using the "Heavy Fighter" optional rule, which makes them easier to use but also easier to catch. On discussion I suspect for tournament play these should be made a bit cheaper if Heavy Fighter is in use.

Probably the most interesting "build" was Steve and his "Four of a Kind Aces" build. Each was chosen with a skill that supported other Squadron mates. Of course this is a very expensive way to build a list and at 500 points you needed to take cheap fighters - nothing more than 25 points, so it will be limited to Wildcats, Mig3s, I16s and that sort of thing. I think it was interesting, but only 4 planes means you are very vulnerable to accumulating Boom Chits. I also noticed that it meant Steve was pretty much forced into a very tight deployment and that he needed to keep close to each other to get the benefit. Dan and his Spitfires exploited this ruthlessly, one managed to trigger most of Steve's Ace skills and Steve failed a couple of retention rolls so lost them for the turn, another Spit got inside Steve's tight "Lufbery" and tailed and took a shot at a Wildcat  - Steve rolled badly on the dodge and was shot down.

On mechanics - the new optional "crit to hit deflections" worked well - even though I missed most of mine (doh!) and everyone liked "open play" with the cards. 

Certainly food for thought.

Overall winner was Sean and his Zeros, so he got a signed copy of Air Strike (thanks Andy Chambers). Me, Dan and Paul were the "runners up" and all grabbed a new Squadron Box set donated kindly by Warlord Games (thanks again). Best painted went to Sean's Zeros, and wooden spoon for finishing last went to Joe, both got a set of measuring tools from "Just Lasered" - thanks again to Mel at Just Lasered for donating those.

In discussion it looks like we are going to try and organise another event in Sunderland soon - I'm certainly interested in that, and I hope this could be the start of some more organised events for Blood Red Skies.

York Blood Red Skies Tournament – Player Lists

1. Steve Ellis – US Pacific Early War
4 F4 Wildcats
4x PS5 (Mother Hen, Set Them Up, Eagle Eyes, Reflexes)
Equipment – Tropical Filters, Drop Tanks
Doctrine – Aggressive Tactics
Theatre (1) Restricted Airfields
Theatre (2) Superior Armaments


2. Paul Davison – British Late War NW Europe
5x Spitfire XIV
1x PS4, 4x PS3
Equipment – Drop Tanks
Doctrine – High Altitude Performance
Theatre (1) Down Drafts
Theatre (2) Poorly Trained Opponents

Sorry - for some reason I lost the pic of Pauls beautiful Mk XIVs (Doh!) but this is a low res one


3. Dan Ibekwe – British Late War NW Europe
6 x Spitfire IX
1 x PS4, 3 x PS3. 1 x PS2
Equipment – Polished Performance
Doctrine – Intruders
Theatre (1) Met Office
Theatre (2) Radar Jamming


4. Joe Chandler – British Early War NW Europe
6 x Hurricane II
1 x PS5 (Blackout Master), 1 x PS4, 2 x PS3, 2 x PS 2
Equipment – non
Doctrine – Defensive Tactics
Theatre (1) Radar Support
Theatre (2) Met Office


5. Sean Griffiths – Late War Japanese Pacific
6 x A6M5 Zero
2 x PS 5 (Aggressive, Blackout Master), 4 x PS 2
Equipment – Drop Tanks
Doctrine – Aggressive Tactics
Theatre (1) Radar Support
Theatre (2) Bad Weather


6. Cam Murray - Late War Soviet Eastern Front
5 x IL2 3M
1 x PS5 (Mother Hen) 4 x PS 4
Equipment – none
Doctrine – Interlocking fire
Theatre (1) Low Level Haze
Theatre (2) Supply Shortages

Cam couldn't attend due to a last minute transport problem

7. Ross Hendry – Late War German North West Europe
6 x Fw190A
2 x PS 3
4 x PS 2
Equipment – none
Doctrine – Big Game hunters
Theatre (1) Low Level Haze
Theatre (2) Bad Weather


8. Chris Jarratt – Late War Japanese Pacific
5 x J2M Raiden
1 x PS5 (Aggressive) 1 x PS 4, 2 x PS3, 1 x PS2
Equipment –Tropical Filters
Doctrine – Aggressive Tactics
Theatre (1) Radar Support
Theatre (2) Tropical Conditions


9. Ken Natt (sub) Soviet Early War Eastern Front
6 x MiG 3
Ivan Pokryskin (The Right Stuff, Set Them Up) 1 x PS 4, 4x PS3
Equipment – Drop Tanks
Doctrine – Low Altitude Performance
Theatre (1) Bad Weather
Theatre (2) Restricted Airfields


Monday, 2 December 2019

Back to the Bridges - Blood Red Skies Mig Alley

We (Paul my usual oppo) and me had sort of wandered into doing some F9F Panthers for Blood Red Skies \ Mig Alley to support our usual Migs and Sabres. He has a 3d printer which makes getting hold of less mainstream models easier. Once we had the models we went looking for scenarios and if you have F9F Panthers, well you can't avoid "The Bridges of Toko Ri". If you haven't seen the 1954 film, search for it on whatever streaming service you use. The film is based loosely around the US Carrier strike operations trying to cut North Korean communications by hitting bridges. There's the usual Hollywood romance plot but the film has several good points, including some excellent real life footage of Panthers both in the air and being readied and spotted on deck - well worth a look and almost contemporary with the "real" thing.


Anyway a couple of weeks ago Paul had a go at hitting a bridge with a squadron of six F80s escorting a strike of F9F Panthers - this was a 750 point game. I had four Mig 15s, and we milled about, had fun and achieved not a lot as far as the bridge demolition went. Paul was not a happy bunny as his first gen Jets were struggling against the 2nd gen Migs, but his numerical advantage told in the end and he managed to drive the Migs away but failed to damage the bridge.

So tonight we decided that MacArthur insisted the Navy had another go, and stepped up to 1200 points to make it really interesting. We are lucky to have access to the beta versions of the scenarios from the soon to be released Air Strike supplement, so we decided to use the "Priority Target" mission from that. Paul had obviously been thinking about how his F80s struggled last time, so this time he brought the "A-Team" - a full six plane squadron of F86 Sabres and a pair of F80s to make the numbers up. As he had more than three fighter elements he got two six plane squadrons of F9Fs as the Strike part of the mission - so the US had a total of 20 jets (gulp). Meanwhile the Commies (me) had a section of 4 MiGs with ahem Soviet pilots, and 4 much less experienced Chinese pilots, all deploying in two plane elements. There was also quite a bit of Flak - four points of both heavy and light at the bridge. The scenario allows the defender (me) to exchange some flak for some barrage balloons - this is not as daft as it seems as historically there are examples of the North Koreans stringing cables across valleys to bring down enemy planes, so I thought we would give it a try. The other new idea we were using from Airstrike was terrain. Airstrike can allow players to set terrain by area or usually quarters of the table for simplicity designating the area as flat, undulating, urban etc etc each of which has different effects on the scenario. As the area is very hilly and has some steep valleys, so we classed the terrain as "Elevated", which gives some cover from light flak but also reduced the number of dodge dice a disadvantaged plane has due to the abundance of hills that can interfere with his manoeuvres. Oh Boy was this going to get interesting later.

The game starts with the attacker having one or two of his escort elements on table and the rest in High Cover, plus his strike aircraft, all start Advantaged. The defender has one element near the target and the rest in High Cover.  In our game this was a pair of Rookie Chinese Migs. They took one look at the wall of US Jets heading their way and started to scream for help.


The heavy flak put up a barrage. In Air Strike a barrage effects anything that flies through at Neutral or better by forcing a Pilot Test - if you pass you held your nerve, if you fail, you must immediately turn 45 degrees and drop an advantage level, and pick up a Boom Chit. It's only really dangerous if you actually end touching a flak barrage - that can be bad (!). Mostly what this does is makes small planes avoid flak barrages and big ones just grit their teeth and take the chances. The lead element of Panthers decided to risk it and blow through the flak - and both failed their tests. This was a bit of a problem as the squadron starts the mission on one chit anyway, so was now on 3, with six planes in the air. Not a disaster but not great.

The pair of Rookie MiGs climbed for altitude and pulled their "man pants" up higher as all four Sabres forming the escort headed their way, backed up by a blue wall of US Navy strike aircraft. High Cover on both sides declined to appear.


Next turn the lonely Migs did their best, but got engaged by the escorts and could do nothing to stop the wave of Panthers lining up for their strike.


On the other side of the table however four silver arrows appeared to drop from the skies as the Soviet North Korean High Cover arrived. One pair went for the leading element of Panthers, the others headed for the rest.


Bounced from above and behind and still loaded with rockets the lead pair of Panthers had little chance and both were shot down by the Soviets (cough) North Koreans.


That caused one squadron of Panthers to abort due to excess Boom Chits. Both Chinese Rookies tried to get away from the swarm of attackers, but first one then the other went down under US guns, one to a P80 who was clearly punching above his weight.


Their more experienced flight leader and his wingman in High Cover disengaged due to their squadron having 4 Boom Chits and only 2 planes, which was somewhat irking to the Soviets North Koreans who were now seriously outnumbered.

The remaining Panthers swung in to attack. The lead pair were armed with rockets and their job was to suppress the flak around the target. The first dropped low, but before he could shoot he was hit by flak and unable to dodge due to all the hills, he crashed.


The second plane unleashed what should have been a devastating strike, with FP 2, Pilot 3, +1 (Heavy Hitter), +2 Strafing Ordnance - and missed with all 8 dice. The main strike of four then followed the lead pair in, but no-one managed a solid hit. (note - this isn't a surprise. The Panthers had 4 attack dice using their bombs - they had the "Bomb Shackles" card that allows them to use the bombing pilot action rather than strafing - something you need to actually bring the bridge down, but the Bridge is a "Hardened" target so ignores the first two successes of any attack - basically you need 3 hits on 4 dice. That's hard bit not impossible - in fact a one F80 did score 3 hits with 4 dice later in the game on a Mig, so it can be done).


Back with the Migs and Sabres, one of the Migs burned advantage and dropped in behind a Sabre. The Mig has the "Rough Ride" trait, so needed to pass a test to shoot, but this steely eyed Comrade didn't blink, and a Sabre went down in flames.


The odd were still stacked against the Migs, particularly now the US High Cover had arrived, and seeing the Panthers were disengaging and heading for the coast and their Carrier, the Migs also broke off.


All in all a really good game. What really surprised me was how fast turns ran, even with 20+ Jets on table at any one time. The terrain also made a big difference, making getting tailed and driven down low VERY dangerous. Flak was well balanced, being mostly an annoyance but on occasion being rather deadly. We played the scenario with a total of 28 jets (not everyone was on at the same time) and got our result in just over an hour or so, which is amazing if you compare it to other air to air games where you can spend half an hour trying to plot the exact move of each plane.

The game ended in a win to the defenders - just. Points were even but as the Bridge was not damaged the Commies were the happier of the two sides, and also claimed 3 air to air (2 F9Fs and a Sabre) plus one F9F to flak for the loss of two Migs.

I rather suspect we will be going back to those bridges again :-)

If you fancy trying out a bit of BRS MigAlley you need the rules and counters from the starter set and the Mig Alley supplement. If you don't have access to a 3d printer then Armaments in Miniature have a very nice selection of Korean War jets available. The rather beautiful game mat we were using was from Deepcut Studios, and the acrylic markers etc in the pics are from Just Lasered. All highly recommended.


Wednesday, 16 October 2019

A break from WW2 - Mig Alley

As a bit of a diversion we thought we would give Mig Alley a run out. In case you missed it Mig Alley is a supplement for Blood Red Skies taking the game into the Korean War and introducing jet vs jet combat. You need the main rules to play - Mig Alley is sold as an expansion which assumes you have BRS. But you really should have them already as they're so damned good ...........

Anyway the thing about Mig Alley is it really hammers home just how different jet combat was to WW2 - or rather, just how much faster things happen. The main change in the game mechanic is the Jet Trait, which can really catch you unawares. Jet allows a plane with this Trait to gain an advantage level on activation as long as there are no nearby enemies, and other aircraft of a lesser power can't climb for advantage within range of the jet. This, combined with the very high speeds everyone is travelling makes for Mig Alley games to be very different to WW2 BRS.

So off to the action. Somewhere over the Yalu River a flight of MiG15s of the North Korean Air Force sight a flight of USAF F86 Sabres. The lead Mig - piloted by a particularly tall, blond haired North Korean with a Russian accent decided to engage - even though he was one plane down (the Yanks had cunningly played the "Restricted Airfields" Theatre card during set up, costing him a MiG), but superior Soviet radar direction (Radar Direction Theatre Card) meant all the MiGs were starting at Advantage, where most of the Sabres were not.


The Sabres split into two pairs, Ivan and his wingman were separated from the lone MiG. All of the MiGs jettisoned their Droptanks (Equipment Card) and pushed the throttle up.


Turn 1 and the Russians (err North Koreans) had an edge, using their "Opening Shot" Doctrine card, to take long range head-on shot, they inflicted a Boom Chit on the closing Sabres and then closed to within 9", preventing the Sabres using their "free" Jet climb for advantage. The Sabres tried to manoeuvre but were at a lower advantage level so could do nothing even when one of them did get behind a MiG.


This didn't last long however as the single MiG was forced into a disadvantaged situation by the pair of Sabres facing him which also inflicted two Boom chits. Ivan decided his best chance was to burn his Advantage to dive onto the tail of the Sabres attacking his lone comrade, ignoring the Sabres he was tangling with. He took another long range shot (Opening Shot again) and caused a second Boom chit on the USAF, then managed to get into a shooting position on the Sabre - if he could get a hit and shoot it down the Yankees would break. However his MiG had the Rough Ride Trait meaning he needed to pass a pilot test to take the shot - and he failed, as did his wingman (doh!), even though both had the Sabre at their mercy the high G force they were inflicting on themselves was just too much (the USAF have G Suits to avoid this).


Burning advantage had left them vulnerable, and the original pair of Sabres followed them. Both Sabres got hits which the Russians (err North Koreans) dodged, but they were now past their Boom limit and they headed for home. Both sides claimed kills - after all, all that shooting MUST have hit something, and several planes were seen diving away trailing smoke.

All in all this was a great game - and really showed just how different the jets are from their propeller cousins. The Migs made a mistake burning advantage to try and get the Sabre, or rather they gambled and failed. Once they were no longer in an Advantaged state they were vulnerable to being harried, and forced out of the fight. BRS moves at a pace normally, but with Jets involved this really steps up.

All of which means I need more MiGs.

A quick word on the models. These are all 3d prints. We have the Warlord ones in metal and they are more detailed than these 3d printed versions, but being metal they need a special stand. Neither of us are keen on that. When Warlord get the jets into resin, as they are suggesting, I suspect that will change. 

Thursday, 13 December 2018

The Way Home - New Blood Red Skies scenario


 Andy Chambers is working on some new rules and scenarios for Blood Red Skies which are designed around attacking ground targets. This includes not just the actual attack but also the often dangerous bits between the attack and getting home for well deserved tea and cake (or in this case as will become more apparent later - coffee and pancakes). Andy has kindly let me have a look to playtest some of them, and I had a run at one last night with James* at Asgard Wargames (our very Friendly Local Games Store and plastic \ lead supplier, in Middlesbrough - well worth a visit if you are in the area). So here is a quick report on the scenario called "The Way Home" - sorry about the pics - I had forgotten to pack the pretty neoprene game mat so we just flew over some nondescript greenery...

Firstly the setting. After fighting their way through and attacking the target the bombers have turned for home. They are not in great shape, with one engine out, and need to get out of the area quickly - then a gunner spots some dots closing fast from below.......

The scenario starts with a bomber force half way across the table. Escorts are split, with one element on table and the rest in High Cover. The interceptors similarly have one element on table and the rest in High Cover, but as they deploy second they certainly have the drop on the Escorts or the bombers. The actual number of bombers depends on the size of the game being played - each pair of elements of escorts generates either three single engine, two twin engine, or one four engine bomber. This is a nice touch as not everyone has a collection of heavy bombers. The bombers already carry a boom chit to represent damage they have picked up on the way. As James was flying as Escort had four P51s rated 5, 5, 3, 3 this meant I could get one of my B17s on table for him to look after - Hollywood demands it! I was intercepting with four Me109Gs - my 109E models standing in for their more advanced relatives. Their pilots were rated 5, 4, 4, 4. With hindsight I probably should have went for a bit more quantity over quality but hindsight is a wonderful thing.

And so it began. B17 DF-B "Bad Penny" of the 324th Bombardment Squadron, 91st Bomber Group was having a bad day. After bombing the target she had been hit by flak and lost an engine. That caused her to drop out of formation - and as everyone knows, that's when The Bogeyman comes to get you. Luckily she picked up a pair of P51s who were going to try and shepherd her home.

Initially it looked pretty bad for the escorts too, as a pair of 109s seemed to have got in behind them on setup, however when we rolled for starting advantage both 109s blew it and were Disadvantaged, even after their Radar Support. Turn one saw the P51s head for some cloud cover as the 109s climbed for position. Both sides called in their High Cover supports


Turn two and the Germans went after Bad Penny. However as the lead 109 lined the B17 up in his sights James played "Poorly Trained Opponents" on me, and my pilot forgot he had his safety catch on. This left us in an interesting dilemma because the bomber would only shoot if attacked, but the 109 had not technically done so due to his inability to find his arse with both hands. We decided the intent was enough - and Bad Penny's rear gunner hit the 109 causing a boom chit.  The second 109 of the pair wisely held off to cover his leader, as the P51s were swinging around, but the lead 109 of the High Cover element used his Great Dive to get a beam shot into the already damaged B17, taking out the top turret in the process. It was looking a bit bad for Bad Penny.


Turn three and the P51s threw themselves into the fight. A head on pass hit one 109 and caused a boom chit, and a deflection shot got another - the 109s were at 3 boom - not great. In return a P51 was also hit, but the wolves were closing in on the stricken bomber.


And then the German luck, which had never been great, went bad. In an attempt to get the bomber one 109 got too cocky. His cannon raked the B17, but the tail gunner shot back (note - the B17 had lost 2 boom chits so was at 0 FP for her defensive guns, EXCEPT for the rear arc, which had the +2 bonus- those tail .50 cals are a bitch). The 109 staggered under the impact and went down, inflicting 2 Boom chits on the Germans and causing them to break off.


Bad Penny staggered home, full of bullet holes and wounded heroes.


It was a great little scenario. A bit quick but that's probably down to our decisions and dice rather than anything in the scenario. Hindsight is wonderful and we probably should have used some twin engine bombers, but as the saying goes, if you've got it, flaunt it, and B17s are bloody lovely to look at at this scale. Looking at the other scenarios it looks like we may have the opportunity to play a connected series, with the approach to the target, the actual attack, then the run for home. I'm up for some if that!

We have a couple of queries and feedback to pass back to Andy, but this is certainly looking like another nice scenario for Blood Red Skies when it gets published properly next year.

* James Farquarson, not the infamous "Traffic James" for players of Andy Cs previous game "Dropfleet Commander" 

Sunday, 9 September 2018

Blood Red Skies - Ba Ba Black Sheep

Just back from Asgard Wargames in Middlesbrough where a bit of Blood Red Skies was going on. Not a lot out of the ordinary I know except Paul was trying out his new F4U Corsair Squadron VMF 214  VF17 aka - the Black Sheep Jolly Rogers using beta stats for the Corsairs. Flying against him today was James and his rather less famous A6M5 Zero Squadron. The game was 500 points and using full historical Doctrine and Theatre Cards.

Pauls Corsairs were 44 points each, and he  started with an Ace, two Skill 4s and a Skill 3 Pilot all flying F4Us, and chose High Altitude Performance for his Doctrine, and Numbers and Poorly Trained Opponents for his Theatre Cards. Numbers added 2 Skill 4 Corsairs (ouch). James took six A6M5 Zeroes with two Skill 4s Skill 3s,  Aggressive Tactics and Heavy Flak Presence (he didn't have any more Zeros so Numbers wouldn't work)

Very fast moving F4Us - hence the blurry pic :-)
More sedate Zeros
Set up was "interesting". Paul managed to leave a gap at the back of his formation into which a pair of Zeros appeared
Doh! said the Fighter Direction Officer

Starting positions
That initial screw up was not as expensive as it could have been as both the "sneaky" Zeroes rolled Disadvantage on their set up dice and were effectively out of the game for a turn or two. In fact most of James' Zeros were starting Neutral or Disadvantaged so it wasn't looking great.

Turn one was mainly a matter of the F4Us using their high speed (9 \443mph) and Great Dive abilities to get into position to outnumber the main Zero elements before the trailing pair, who were clearly "grabbing" for altitude to join the fight could get involved. It wasn't looking good for the Zeros

But somehow the Corsairs just couldn't seem to make it stick. They inflicted an early Boom Chit on the Zeros, but then one of them got caught tailing a Zero into a cloud by the (quite shocking) combo of Tight Turn and Aggressive Pilot, and took a burst of 20mm cannon shells that even his "Robust" trait didn't help with, evening out the Booms. A second quickly followed, which the F4U failed to dodge, first blood to the Japanese.


The Corsairs struck back with another Boom, but it was quickly clear they were trading rather than making their local numerical advantage stick. Meanwhile the two trailing Zeros burned advantage to dive towards a cloud, then used their pilot action to regain their neutral status.


Back in the Furball the Corsairs were still struggling to make their Firepower 2 stick as the Zeros just kept dodging, then ,finally they connected, hard, and a Zero rolled into an uncontrolled dive, a victim of the US Ace. Score was now 5 all with both sides having 5 planes left - next hit would decide it.


Remember those two Zeros stooging around in an innocent manner at the back? Turns out they were not quite as innocent as they seemed - they burned advantage to Dive through the cloud, which reset them to neutral and put them on the tail of a pair of Corsairs.


 They initially missed, but they dropped one Corsair to Disadvantage due to tailing, and a third Zero carved his way in and delivered the Coup de Grace. The Corsair tried to dodge but his Agility 2 didn't work and another Corsair went down in flames.


The F4Us tried to grasp a draw but just couldn't line up a shot, and they broke for home


Thanks to Paul & James for the game. A good time was had by all


(Edit. Apparently the Corsairs are VF17 The Jolly Rogers NOT the Black Sheep. Need to think of a catchy new title................)