Showing posts with label MiscMinis. Show all posts

Wednesday, 15 February 2023

Blood Red Skies - "Grisha" Rechkalov - Bad Boy Red Ace?

While I have been taking a break I discovered a “spare” P39 model.  I have a Squadron of six painted up in Soviet colours so I thought as a little side project I would paint it as an Ace for Blood Red Skies.

But which one? I did a bit of research and decided on Grigoriy Andreyevich 'Grisha' Rechkalov, Double HSU (Hero of the Soviet Union) and a bucket of other awards gained mostly while flying Lend Lease P39s with 16 GIAP.

This is him - baby faced chap second from the left.
 
Incidentally the four pilots in this pic have more than 120"kills" between them.

And this is one of his P39s 


There were a couple of reasons for choosing him. 

1) He was the highest scoring Airacobra Ace (of any nationality, not just Soviet), with 50 of his 56 claimed kills coming while flying the P39. Putting that into perspective, the highest scoring US Ace was Richard Bong, with 40, and Johhny Johnson was the RAF highest scorer with 34*.

2) The markings for Grisha’s plane are included in the Soviet P-39 Airacobra decal sheet from Miscellaneous Miniatures - link here

3) He seems to have been a bit of a character, being subject to some rather pointed comments from his compatriots. This is unusual in the old Soviet Union where their heroes tend to be portrayed as whiter than white (Redder than Red?) Communist icons untainted by any criticism. Also there is some details that could be used to assign the two Ace Skills needed to him. All Good so far

4) The paint project looks simple enough but different to the "normal" Soviet P39s I have due to the tail flash. At least that's what I thought. More on that later..........

So what about Grisha’s skills? 

Firstly he seems to have been a bit what we could call a “glory hunter”. He had a rather big "beef" with Pokryshkin who he flew with as wing-man, and later they had a major falling out that resulted in him being relieved of command of a Squadron for "losing control, indecisiveness and lack of initiative" - ie concentrating more on his own kills than looking after the pilots under his command. This is all rather salacious and well worth a google if you are interested in the rivalries between aces, even supposedly fraternal Soviet ones. In return Retchkalov claimed Pokryskin was padding his kill stats by claiming as his own some of Retchkalov's kills.  It doesn't seem to have harmed his career too much as he later became a General post war. In Blood Red Skies Aces have special skills, and one of them is “Loner”, which grants bonuses to pilots if they operate away from friends, so that seems appropriate for Grisha.

Secondly, everyone, even his critics commented on his superb marksmanship. This should come as no surprise as you don’t get 50 kills if you cant shoot straight. There are a number of Ace Skills that can apply here, “Accurate”, “Killer Instinct” and “Tail Snapper” all would work, but I think Accurate is a good enough fit. That would give him a +1 shooting dice. Killer Instinct is a bit of a waste as his 37mm canon supplied by the Bell Aircraft Corporation already makes his P39 rather dangerous.

The last factor is his bonus to either Agility or Firepower from being a named Ace. Either seems reasonable, but I think I would go for +1 Agility.

So what would this package cost? I asked Andy Chambers (Name drop) and he thinks 125 points, which is not unreasonable, and combined with the bargain 23 points for an early P39 makes him just about "do-able" in a points based list. Maybe. 

How will he play - no idea, but if he's in a Soviet P39 we're looking at an eight dice attack with auto Critical which is "spicey", but a bit of a liability for the rest of the Squadron.

So now all I need is to find someone with talent who can lay out an Ace card. Step forward the multi talented Martin Wilson who proceeded to create this for me (Cheers m8!)

Postscript. All that was written with a mind to adding him to my Soviet Airacobra Squadron, so just before I planned to start the painting I dug them out to refresh my memory on the scheme I had used, only to discover I already had painted one up as an Ace - a certain G.A. Rechkalov ..... you really can't make this up!


Grisha and a wingman and yes I had forgotten I had already painted him!

If you fancy trying out a Soviet P39 Squadron you can get the models from Warlord here or from Armaments in Miniature here . You can use the standard stat card from the Warlord US sets. The Soviets were not enamoured of the wing guns and often removed them. If you want to do that you can use the "Reduced Armament" Equipment card, which adds Agility at the cost of Firepower. Alternatively Martin has created this card using the Beta stats from The Ready Room (which coincidentally IS Rechkalov's P39)


I mentioned earlier that Rechkalov flew as wingman for Pokryskin. If you feel like recreating this pairing he is already available as an Ace from Warlord, this time in his MiG3 which you can find here 

*Pat Pattle was credited with at least 50 kills but as the Squadron records were lost in the fall of Greece these are sometimes overlooked. Nothing at all to do with Pattle being a South African not a Brit, no, absolutely not…..
  

Sunday, 12 July 2020

Back in the saddle - Battle of Britain Campaign game 1


This afternoon saw my first game against a real opponent since the lockdown began, and it was nice to get back to a table - even if we were socially distanced. 

The game was Blood Red Skies - actually the first of what we hope will be a series of BRS games that will run over the summer mirroring the phases of the Battle of Britain - so real time minus 80 years. I should add as this was our first game back we were quite rusty and also managed to forget the sea coloured gaming mat, so we made do with a spare from Cruel Seas that was in the shop, and also my camera was still charging so I had to use my phone - which is my excuse for some of the ropy pics that follow

I'm playing the Germans - in this case elements of I / ZG 76 in their Me110s. Todays game was part of the KanalKampf phase of the battle and was a Fighter Sweep mission over the Channel.

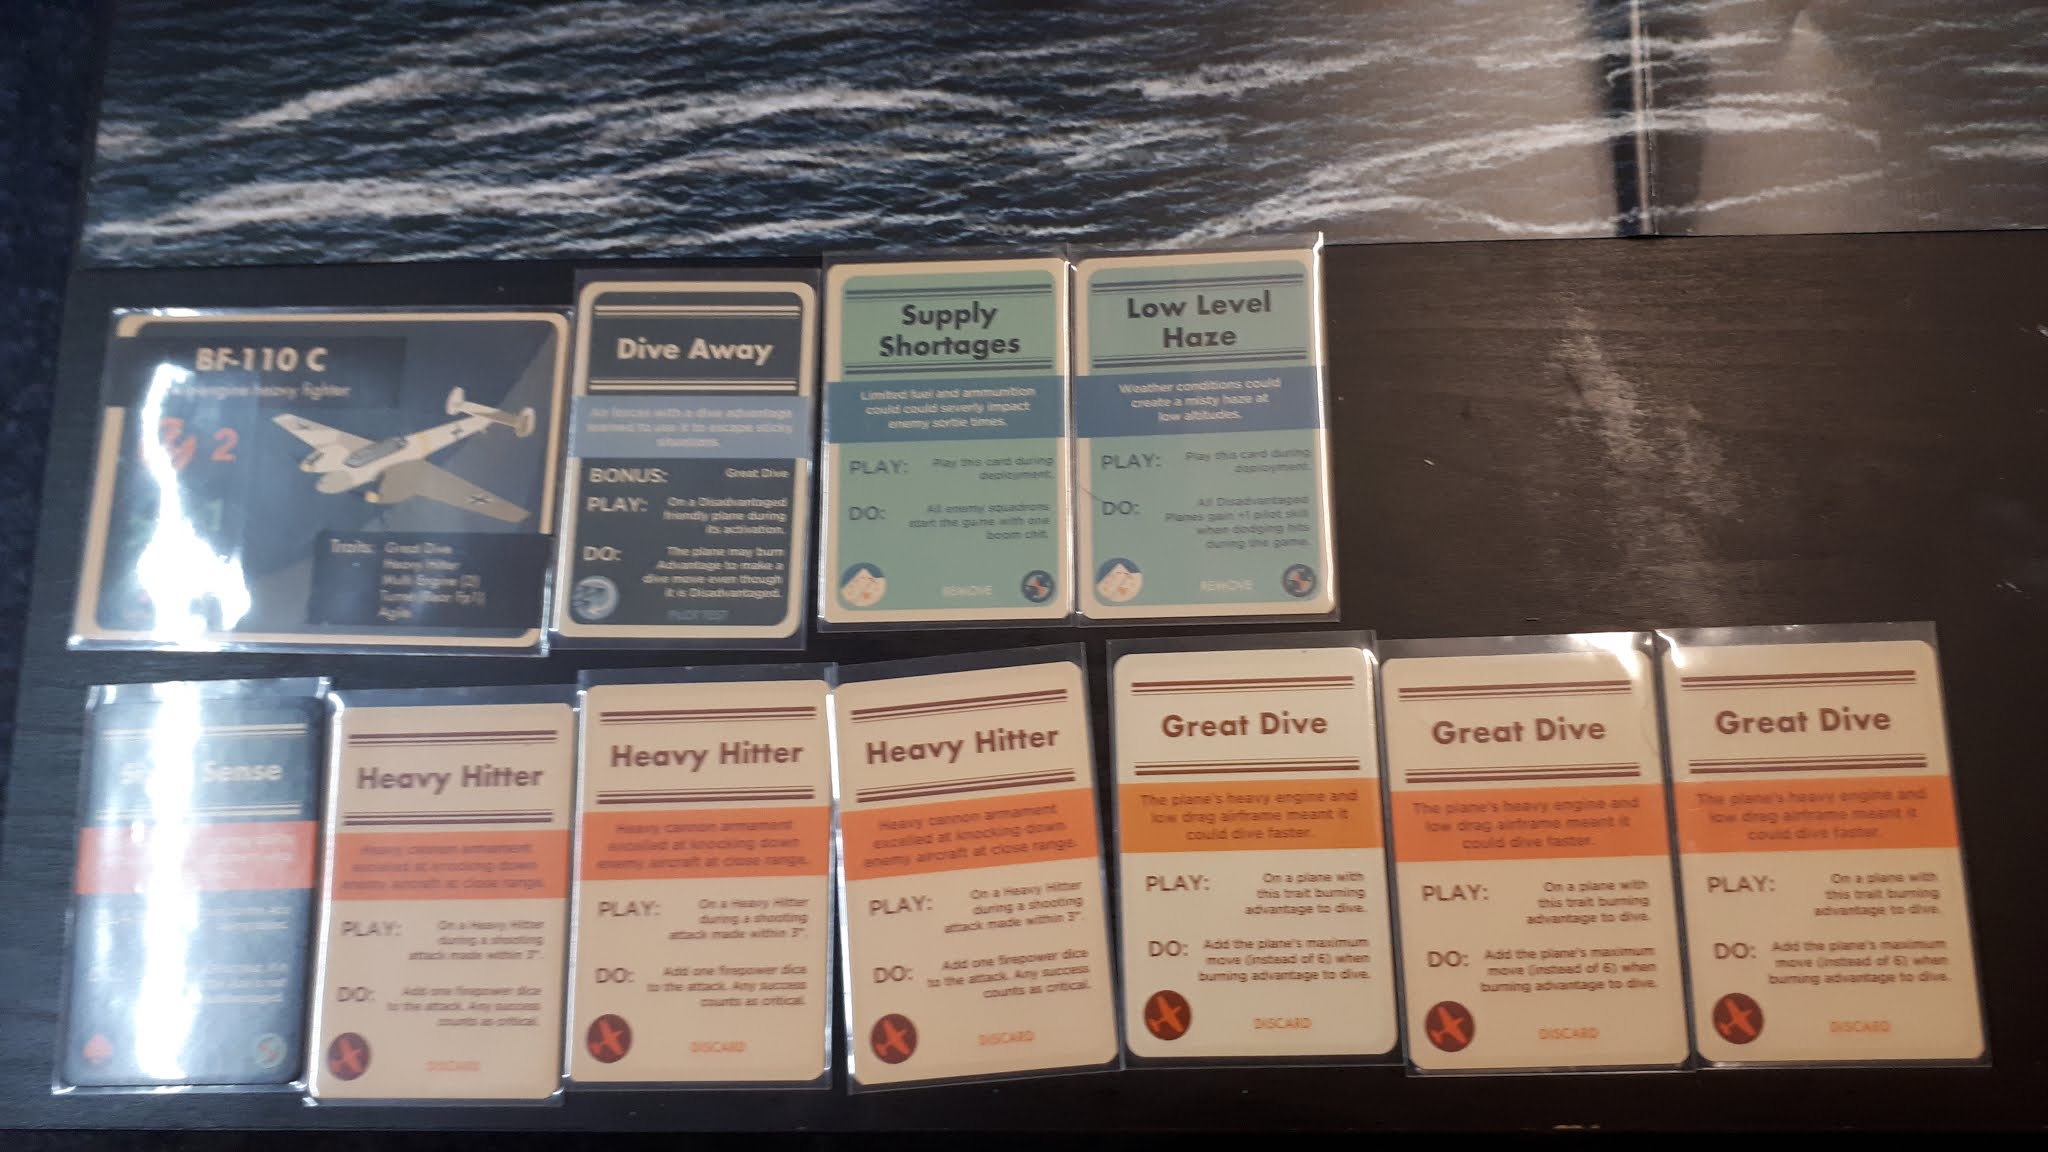
We ran into some RAF Spitfires and had a very interesting battle. The initial pre game and set up didn't go well for the Luftwaffe. The RAF played the "Restricted Airfields" Theatre card, meaning in the confusion and congestion on our new French airfield something went wrong and one of the 110s failed to join up. This wasnt a one way thing however as the RAF were suffering from the "Supply Shortages" Theatre card - still getting back up to strength after the Battle of France and this caused them to enter the game with one Boom (morale) chit.


Slightly less satisfying was the initial set up positions. Both elements of 110s were caught snoozing and were disadvantaged, with the RAF being much more on the ball, starting with one pair in High Cover, one Advantaged, and one disadvantaged. This was quite a blow as one of the quirks of the scenario - starting positions of Disadvantaged aircraft are chosen the opponent not the player. This was not good!  Here is the set up with the Luftwaffe circled in yellow and the RAF in blue.


The first turn saw the 110s form something vaguely resembling a Lufbery Circle with both elements trying to cover each other as the Spitfires came screaming in.


This was however a cunning plan (or at least it seems to have turned out ok , which is almost the same thing!). The 110s made judicious use of the Dive Away \ Great Dive combo to put some distance between them and the Spitfires, wrong-footing the RAF somewhat who were not expecting the Germans to be able to burn advantage to dive. It has been said many times that Great Dive on a Speed 7 plane isn't that great, but in this case it was a lifesaver, allowing the 110s a little time to claw for altitude \ Advantage. One lone 110 piloted by Lt Hubert Gruber bravely engaged a pair of Spitfires to buy time for the rest of the Squadron.


This allowed the COs pair to dive through the clouds and get into a position to turn on the Spitfires in the next turn (hopefully)


A fairly "active" furball then developed, however the 110s were careful to keep their discipline and not throw away their planes in risky manoeuvres, and also cover each others tails - clearly having read the  Dicta Doug!


The RAF seemed to be having an off day. The Spitfires were I think intimidated by the firepower of the 110s and started to use their Defensive Tactics doctrine a lot. This is quite an interesting card as it allows a plane to turn a normal shot into a much harder deflection shot, but at the cost of breaking up your formations. No Spitfires were shot down, but they did accumulate some Boom Chits and more importantly, they lost their cohesion and wingmen, and it was now the 110s that were in the driving seat. 


The RAF did manage to rally a little and regain their composure, with one pair of Spitfires latching on to the German leaders tail. Luckily he had the "Sixth Sense" Ace Skill, which stopped him becoming tailed. 


The game ended when the Luftwaffe managed to score enough Boom Chits to make the Spitfires head for home. It was a bloodless victory but a good way to blow the dust off the models and get a game in. Looking forward to the next mission where I hope to sink some British shipping in The Channel !


Tuesday, 4 February 2020

BRS Finns

I've been thinking about starting a new nationality for Blood Red Skies. I already have "cough" several squadrons, British, German, Soviet, Japanese and some American, but I'm thinking of doing something a bit less mainstream. Choices were narrowed down to French, Italian, or Finns. Finns won out, mainly because I have some spare Soviet bombers that I can re-purpose, and could get some 3d printed fighters, so this was going to be a fairly low impact project, at least as far as my wallet is concerned.

I'm initially planning just two Squadrons - one fighters, one bombers. The bombers will be Tupelev  SB2s, a mix of Armaments in Miniature and Zvezda models. The Finns didn't have much of an aircraft industry and relied on either imported or captured models. In the case of the SB2s, they managed to recover and repair at least five Soviet SB2s over the period of the Winter War, and put them into service as maritime patrol and attack bombers. Later they "acquired" more via their then German allies who captured large numbers during Operation Barbarossa. This meant they used several different versions of SB2s, which gives me a good excuse to reuse those spare SB2s I had lying around without worrying too much about them being different models.


The fighters will be Brewster Buffalos. These are 3d prints provided unbidden by my regular opponent Paul. Yes I know I have been less than complementary about them in the past The Little Plane that Mostly Couldn't but ..........

Pics from Wings Palette

Decals will be the excellent ones from Misc Minis

I'll update as the project develops


Tuesday, 16 July 2019

Painting models for Blood Red Skies - or "What not to do"


I've been asked to explain how I go about painting BRS models. As I was just about to start on a Squadron of Ju87s I thought "why not"? I don't think my results are that good, but they work at table distances, so here goes. I should also add that most of the "advice" that follows are the result of my mistakes in the past so are there just to make life easier if you try it -in fact as you read this you will see where I keep making schoolboy type errors. I should know better :-)

The actual models are from Armaments in Miniature. I chose these for two reasons over Warlord's metal models. Firstly, and most importantly, these were going to be for my Battle of Britain game, so needed to be the Ju87B variant, and Warlord only do the later Ju87D at the moment. Secondly, the AIM models are resin. I prefer resin or plastic over metal anyway for BRS models, but in this case I had in mind the fact that the undercarriage on both the AIM and Warlord models were separate parts. If I was going to end up trying to get these to sit right I thought resin would be an easier material to work with. There are significant cost implications - basically a Squadron from AIM will cost you twice what the same one from Warlord will by the time you factor in bases and postage, so you need to weigh that in to your calculations. If Warlord ever switch to resin, and there are persistent rumours this is on the cards, I'll be first in the queue.

Step 1 - Clean up the model. This applies to all types - metal, plastic or resin. Take a few minutes to clean any mould lines up. Do this twice! This is particularly important if you plan to use a lot of washes later on. AIM models in particular have very fine mould lines and because they're usually cast in a pale cream coloured resin they are often hard to see - until you start to paint it later.  With my Ju87s this is where I made my first mistake. I was less than thorough about the clean up and missed some mould lines, particularly around the undercarriage "spats" which came back to haunt me. Give the model a wash to get rid of any mould release agents. Some plastic and resin will have deformed - now is the time to correct it with a hot water bath if needed. At this point I also decide on how I'm going to mount the model on the advantage base. This may need some work if metal from Warlord, as the locating hole often seems to get deformed in the casting. If AIM you may need to remove the base mount post, or drill a location hole if you are using Hawk Widgets like I do , or a combination of all three.

Step 2 - Assemble. Most models don't need this, but some, like the Ju87 have separate parts. I don't like this step one little bit, because of, well, the little bits. If you are working with plastic kits in particular take a minute to decide if there is anything that you should leave off, such as flimsy radio aerials and the like. No matter how careful we are, we are making playing pieces not scale display models, so they will get a lot of handling and some bits will inevitably not survive. Better to either cut them off now or omit them rather than having the playing area littered with broken plastic later. The AIM Stukas have a centreline bomb, two under wing bombs, the two spatted undercarriage units and two tail support struts. I threw the struts away as being too fiddly, and anyway almost invisible on the model when in play. What I should have done is thought ahead and painted the main bomb and it's bomb crutch separate before sticking it on later (the bomb crutch is the thing that swings down when the bomb is released to ensure the bomb falls clear of the prop arc - pretty essential for a dive bomber) but at the time I was more worried about gluing the undercarriage on and having to work around that, so the main bomb got glued in first. My worries about the undercarriage were well founded. There are small locating holes and pins on the AIM model, but due to my earlier failure to properly clean the (very) small parts properly at step 1 I really struggled to get a good fit. In the end I drilled the locating hole all the way through the wing, This helped, but in another Doh! moment I forgot to clean and fill the upper wing afterwards, which I should have done. In my defence this was getting to be quite a frustrating build.

Step 3 - Undercoat. I use a cheap spray from Halfords or similar. I've used more expensive and better versions such as Tamiya or GW but the details on BRS models don't really justify it and I always have cheap primer around.  Grey for preference unless I am cheating and painting something in winter colours when I would use white. I try to avoid black.

Step 4 - Decisions. I search for an online source for camouflage patterns and when I find one I like or that matches the Squadron I'm building I print it off. I usually try and get a 3 view plan if possible. Wings Palette is a great site for getting ideas - link at the bottom. I also write on the plan the colours I intend to use. This is actually quite a good idea if like me you have a lot of different paint colours as the number of times I come back to add another model to a squadron then forget which paint colours I used is quite common. Keep it in a safe place. If you are using some of the excellent paint sets available this may be less of an issue. The actual colours are down to personal choice - in my case I'm sticking to the original scheme I used on my Me109Es back in the stone age so my Battle of Britain era Luftwaffe look homogeneous. I mentioned paint sets and if you can get them I would recommend using them. Sadly I didn't with the 109s so I'm not with the Ju87s, instead relying on TLAR (That Looks About Right). In my view I think people get too hung up on the "right" colours, forgetting that in wartime all quality control goes out the window, and anyway, scale models really need to be somewhat brighter than the real thing to show up, so in general, if you think it looks ok, it is.

Step 5 - Blocking. I start with the underside colour and block it in. Then using the printed sheet I do the rest in fairly quickly. Where there is a camo pattern I try to copy it without getting too involved in the details. I usually block the lightest colour first.


Where there is camo I simplify the pattern if necessary and try to get some reference points on the model - so for instance starting a pattern where an elevator is marked or at a panel line. On the Ju87s wings there are two good starting points, on the port wing the camo runs along the angle of the famous cranked wings, and on the starboard side at the wing root. Once you have them in place its easier to work the rest in, or something like it. Having these points of reference makes repeating the pattern on other planes in the squadron easier too. I've marked a couple on the pic below to try and explain the rough sequence. It's not complete but it should give you some idea of what I'm talking about.


Again with my Ju87s I did wander a bit, particularly on the starboard wing and with hindsight more care was needed but............  Models with panel lines make this far easier than those without - one of the reasons I don't like the Zvezda Ju88 . I also block in the cockpit - I use an electric blue as much out of habit as anything else.

Step 6 Tidying up. Best done the next session. Go back over the model and correct any major mistakes. I also tidy up the leading edges. Add canopy highlights - I use a bright sky blue again out of habit. Then I paint the canopy frames, guns etc. When I started off I tried to get the canopy frame colours to match the camo of the fuselage patterns but now I just choose one predominant colour and go with that for simplicity. Also paint details such as guns and the like. I sometimes add exhaust stains at this point too.


Step 7 Gloss varnish. If there are lots of panel lines a quick light coat of gloss will improve the capillary effect allowing thin plaint to work its way into recesses. If there are no panel lines on the model skip this and put some £££$$$ in the swear jar. I also attached the Hawk Widgets at this point as I was finished with big paint and the chance of getting paint on the clear plastic is less. Having the widget in place will also give me the opportunity to get a good steady handle on the model for the next step.


Step 8 - Panel lines. Panel lines really make your models stand out. I usually use a wash - Army Painter soft tone or GW Agrax but just pin wash the lines rather than washing the whole model. If the lines are deep enough and you have glossed the model then capillary action will help here. If there are no panel lines like on the Zvezda Ju88s I paint some on - just enough to give the impression. I like panel lining as it really gives the model a lot of character. I also use a pin wash around the cockpits etc. I've just bought some Tamiya panel liner which I hope will make this easier in future.


Step 9 - Decals. If you have not already gloss varnished I would do it now, at least where the decals are going as it gives them a good smooth surface for the decals to adhere to. Actual decals depend on the model and what I'm building. The new decals from Warlord are superb, but the range is limited. Luckily we have the excellent decals from Miscellaneous Minis. These are not so easy to use as you need to cut them from the decal film yourself, unlike the Warlord ones which are individual decals. In either case the process is pretty similar - use microset to prep the area, then apply the decal, microsol, then once dry a coat of gloss varnish, and then finally a spray coat of matt. All done.

So that's it. I'm not going to make claims that my painting is particularly great, but at table distances I think it's "good enough".

One warning - painting BRS planes is quite addictive. They're usually in batches of six which is a nice small painting project, which probably explains why I keep buying them!

Anyway, links
Warlord Games - models and decals
Armaments in Miniature - models
Miscellaneous Miniatures - decals
Wings Palette  - good starting spot when looking for camo

Tuesday, 23 April 2019

The Wrong Zero? - Blood Red Skies

So a couple of weeks or so ago I spent some time regaling anyone who would listen with my reasons to go for "Not A Zero" (NAZ) option for my Japanese in Blood Red Skies, resulting in my Ki44 Shoki Squadron from Armaments in Miniature (AIM).

Thing is, I do have some Zeros too, and I've been painting them up over the last few days.

The models are the "bendy" plastic from Warlord, sourced in China. This gives me no end of anguish, because as I have often repeated, these really are the "wrong" Zero imho. The problem is the Warlord model is the A6M5, which entered service in 1943. I did a couple of posts on these a year or so ago when I first got a glimpse of them. The M5 is the last main production version, which is really a mid war aircraft, so didn't' sit well with the 1940 vintage UK, German and Soviet models in the starter set, and was pretty much dog meat against the 1944 P51D the US got, particularly as the points in the starter were a bit off and made the Zero rather more expensive than it should have been. If Warlord had done the A6M2 of early war Coral Sea \ Midway fame I would have been much happier.

The other problem is the model itself - not wishing to over stress this, but it is a fair bit under scale, something closer to 1:220 than the nominal 1:200 it should be. Like all the "Bendy" (tm) BRS plastic the Zero is a bit prone to, well, bending, and several of mine have some strange wing and fuselage shapes. I know this can usually be corrected with hot & cold water, but it does irritate. It should be said for all of that the model is perfectly serviceable, and 99% of the players wont be bothered by it.

Painting them should have been a fairly easy job. The Japanese don't really have complicated colour schemes, and after 1942 Zeros usually have a simple two tone light grey undersides and green uppers, so what could go wrong? Quite a bit really it turned out. Deciding on what colour green was a bit more complex. You can spend many an hour researching and the best answer is "green". The problem is as much the real WW2 paint was not that standardised anyway, and standards slipped as the supply shortages kicked in. In the Pacific theatre there was the added complication of exposure to the elements which meant paints weathered very quickly, so in reality any green that is near enough is probably good enough. I therefore took the cheapskate option and rifled through my current paint collection until I came upon Army Painter "Greenskin". It looked about right and I figured once it had been dulled down a bit with the Darkshade wash I was intending to use for the panel lines it would be ok. Not sure what went wrong but the bloody stuff took three coats to achieve anything approaching a consistent coverage. The undersides were easier, and the engine covers and canopies were my now standard patterns. It took me a while to block the eight Zeros, and a second session to tidy them up and wash them, but at the end they were looking quite nice, or at least I think so.


So decals. Here I had a cunning plan. I was going to use Warlord's Zero decals.  I usually use MiscMinis, and indeed had ordered some in preparation, but as Warlord did a dedicated set and MiscMinis were designed for use with the AIM model I decided to give Warlord a try. This was partly a response to my knowing that the Warlord model was under scale, so I didn't want to risk the MiscMini decals swamping the models, if you follow. There is an added complication here in that Warlord decals are actually for Zeros based on the carrier Akagi, but the Akagi was sunk at Midway, which was in June 1942, and the A6M5 Zero wasn't even in service until the following year, so Warlord are producing decals for a model they don't make - I got nothing.

That plan went out the window fast. The Warlord decal sheet doesn't have enough of the white edged "Hinomaru" (aka "Meatball" roundel) to complete all eight models. Actually they don't have enough to do the six in the Squadron box, which was a pain. I probably should have done a bit more research and bought two sets. They do include the un-edged Hinomaru to be fair, but that wasn't what I wanted. Luckily, between the left over decals from the Ki44s and the MiscMini sheet I had enough to do the upper wing markings of all eight. The side markings were another issue. Again there was not enough decals but in my "spares" box I had some 1:300/1:285 ones from I-94 Enterprises, and between them there were enough. The tail numbers came from the Misc Minis set, and the under wing Hinomaru came from Warlord. So it was a bit of a collaborative effort in the end. I should add here it was also quite instructional. The main issue with MiscMinis is they are sold as a single sheet, so you have to carefully cut each item, trimming it as close to the decal as possible. This is a major pain in the arse. Both the Warlord and I-94 decals are very different. with each decal being separate. I have to say this made a massive difference in time and general fiddle factor. I will keep using MiscMinis as their range is superb, but maybe in future I will check what Warlord do as well.


So that's about it. Eight Zeros painted up and ready to hit the Blood Red Skies. I think they look "good enough" - in fact I quite like the way they have ended up. I still have one more to paint - that for the Ace Saburo Sakai. I am lucky enough to have a resin pre production Zero from Warlord, and I plan to paint that up as Sakai's mount. It will take a bit of fiddling to get the tail number correct, which is one of the reasons I didn't go ahead and paint it with the rest, but now I have the experience with these under my belt, I don't think it will be too much of a challenge - I may even try to add some weathering. Famous last words.......

One last thought. Nothing has been confirmed by Warlord, but there is a persistent suggestion that they may not be happy with the bendy Chinese models. They have not repeated the process since the starter set, and anything after that has been either the FAR superior UK produced hard plastic as seen in the Mosquito, Hurricane, Bf110 and Fw190 models, or metal. This could be an issue as they are already sold out on a number of "bendy" Ace SKUs and the implication is they will have to either get more from China, or switch to metal or hard plastic. Given the quality of the hard plastic this would be a great opportunity to rejig the moulds and reissue, hopefully taking the time to remaster the 109 in particular. That would be my ideal solution, however the current preference at Warlord is to use their tried and true metal spin casting skills. I rather suspect given the lead time to make plastic they will end up going metal just to fill the gap if it happens.... All idle speculation of course but possibly something to watch in future.

Links
Warlord BRS Zeros
Armaments in Miniature
Warlord Zero Decals
Misc Minis
I-94 Enterprises (available in the uk from Minibits)

If you like this sort of thing why not click the follow button up there on the right?


Wednesday, 3 April 2019

Not A Zero Part 3 Table and war ready

So having got them painted I really need to get the rest sorted out to play them. I'm in the rather privileged position of having access to some of the beta stats for some Blood Red Skies planes, including the Shoki. At some point we hope they will all be published btw but that's not a decision I have any influence over. It's not actually Rocket Science however and players can pretty easily work their own stats out until then.

Here is my rendering of the Shoki data card - basically I copied the layout of the current cards but I lack the technical know how to make them look any good, but it will do for now.


The Ki44 entered service late in 1941. The initial versions would be rated as Speed 7 (365mph) but from the Ki44 -II onward they improved to Speed 8. Similarly the armament was steadily upgraded from a pair of HMGS and a pair of LMGs in the wings to quad HMGS. Some of the Ki 44 II Otsu versions were fitted with a pair of 40mm cannons in place of the wing guns firing a caseless round which had very low velocity, but these were not that popular and were often replaced with another pair of HMGs. The last production version, the Hei reverted to the 4 HMG layout. My card is based on an Otsu without the 40mms or Hei, but for completeness here are all the versions (or my interpretation at least). 

Type
Date
Speed
Ag
FP
Traits
Points
Ki 44-I
1941
7 (363mph)
2
1
Great Climb, Great Dive
24
Ki 44 -II Ko
1942
8 (378mph)
2
1
Great Climb, Great Dive
28
Ki 44 -II Otsu
1943
8 (376mph)
2
1
Great Dive, Heavy Hitter
31
Ki 44 -III Hei
1944
8 (376mph)
2
1
Great Climb, Great Dive
28

So there you have it - a nice, versatile "Not a Zero" for Japanese players who feel like mixing things up and moving away from Tight Turn based Squadrons. Nothing turns like a Zero, but the Shoki can give US opponents quite a shock due to its speed and climb, and a Japanese fighter available in the early war period that lacks the dreaded "Vulnerable" Trait too.

Cheers